

Tactical Medicine – Tourniquet

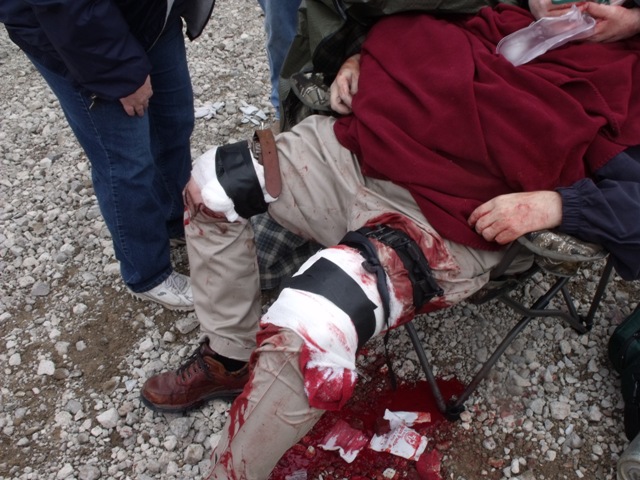
In this post I will talk about the Tourniquet and its effectiveness in controlling a catastrophic hemorrhage. The efficiency of the Tourniquet has been tested in military conflicts and cannot be challenged. But the Tourniquet should not be lacking in the possession of civilians either. Whether it is a serious car accident, a calamity, a terrorist attack or armed robbery, wherever there is a catastrophic bleeding situation, the tourniquet can save lives. The Tourniquet is a hemorrhage control device specifically designed for massive hemorrhage control of an extremity and requires minimal training to instantly treat life-threatening hemorrhage of an extremity. You should never leave behind the Tourniquet. It is a life savvier and if you don’t have one when you need it, you’re in trouble. We strongly advise you have tourniquets in your home, your vehicle, your first-aid kits, bug-out bags, workshop and anywhere else disaster could strike.
5 MYTHS ABOUT THE TOURNIQUET
1.TOURNIQUETS SHOULD BE USED AS A LAST RESORT.
If you have this kind of mentality is a dangerous approach to trauma bleeding. There is an overwhelming amount of studies and data that dispel this myth.
In Combat zone, in a catastrophic hemorrhagic situation the Tourniquet should be the First choice.For many years Extremity Hemorrhage was the number one cause of preventable death on the battlefield it has since been surpassed by junctional hemorrhage (armpit, groin, neck).
2. PLACING A TOURNIQUET EQUALS LOSS OF LIMB. The fact is loss of a limb is extremely rare. The risk of hemorrhage far outweighs the minuscule risk of limb damage. The old “Life over limb” adage applies here. There are many well-documented cases of patients that have had commercial tourniquets in place for greater then eight hours, with no loss of limb. In the cases where their have been a loss of limb(s), they are directly attributable to a gunshot wound, blast injury, shrapnel, fragmentation, high velocity trauma and not as a result of restricted blood flow from tourniquet placement.

3. BELTS MAKE GREAT TOURNIQUETS.
This is not true! Belts make terrible tourniquets; it is extremely difficult if not impossible to completely occlude arterial blood flow using a belt. Utilizing a belt and its buckle will never be tight enough and attempting to tighten the belt with a makeshift windlass is problematic due to it’s rigidity.4. IMPROVISED TOURNIQUETS ARE PROPER MEDICAL EQUIPMENT.
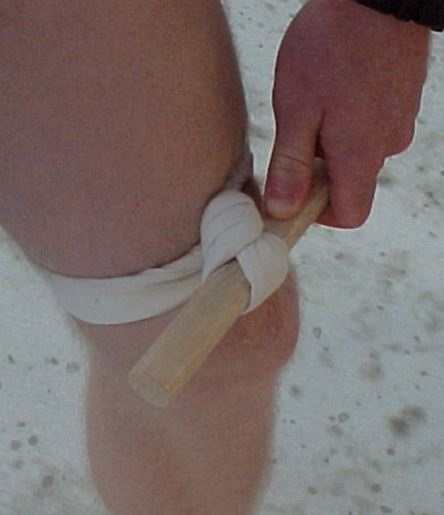
Using what you have on hand in extremes is not only acceptable its commendable. There are no shortages of great stories of people doing self-aid or acting as a first res-ponder, Improvised tourniquets may slow the bleeding, Professional Tourniquets are STOOPING it!
5. THERE IS A BEST TOURNIQUET OUT THERE.
Commercial Tourniquets just like any other piece of gear all have advantages and disadvantages, strengths and weakness, pros and cons. They all have subtle nuances and general rules of thumb regarding their use. I’m often asked what tourniquet I recommend, and my answer is always the question “recommend for who, when, and where?” The Tourniquet that works well for a Marine on his body armor, may not be the best choice for someone doing undercover work. The tourniquet in SWAT missions to treat a wounded Police Officer would be a poor choice in a school shooting with expected pediatric patients. The tourniquet I would use in a controlled emergency room setting would be difficult to use in a low light stressful environment.
CHECK OUT MY VIDEO ON THE YOUTUBE CHANNEL ABOUT CAT TOURNIQUET APPLICATION.
Tourniquets
“(1) Effective use of tourniquets as first aid should be part of the national first aid curriculum. (2) Military tourniquets should be stocked in all emergency vehicles in sufficient quantity to deal with multiple trauma patients.”
DOWNLOAD HERE the PDF manual of using the Tourniquet ![]()

Introduction: How to Use a Combat Application Tourniquet (CAT)


- Friction Adapter Buckle
- Windlass Rod
- Windlass Clip
- Windlass Strap
- Omni-Tape Band
Step 2: Place Injured Extremity Through the Loop of the Omni-Tape Band
Step 3: Place the CAT Approximately 2-4 Inches ABOVE the Injury
- You can use your fingers to estimate the distance (generally 2-4 fingers width should be sufficient)
Step 4: Once Placement of CAT Is Correct, Tighten the Omni-Tape Band Then Secure It Onto Itself With the Velcro
Step 5: Twist the Windlass Rod NO MORE THAN 3 TIMES, Then Insert It Into the Windlass Clip
- Twisting the Windlass Rod more than 3 times may cause it to break.
- If you can twist the Windlass Rod more than 3 times, repeat the previous step and pull the Omni-Tape Band tighter.