
Survival Skills – How to start a fire
Fire; since the dawn of man it’s played a vital role in our existence. From providing warmth and fending off wild beasts, to cooking food and providing comfort during those cold, dark, moonless wilderness nights, fire still plays a vital role in our survival – especially for those who still have that primal need to venture out into the wilderness.
Sitting next to the fire while camping out in the wilderness is a feeling that really can’t be put into words. For a lot of us it seems to tap into some sort of primal instinct that inspires us to almost become one with nature. There’s just something about fire that satisfies some deep down desire that we often forget is even there. Sadly, our modern way of living has disconnected us from our past.
These days, the skills that were once second nature to our ancestors have become something that most people take for granted. While knowing how to start a fire may not be as important to today’s modern man, I think it’s something that everyone should know how to do.
In a wilderness survival situation, knowing how to build and maintain a fire is probably one of the most important survival skills you can have.
Fire Making is one of the oldest skills known to man, its importance can never be underestimated.
Knowing how to start a fire means:
- Staying warm in even the coldest environments
- The ability to boil untreated water.
- The ability to dry wet clothes.
- Being able to keep insects and some animals away.
- Being able to signal for rescue.
- Having the ability to cook Food.
- Comfort.
Primitive methods of Starting a Fire:
- 2 Man Hand Drill
- Starting a fire with a Fire Drill
- Fire starting with a Fire Plough
- How to starts a Wilderness Fire with a Hand Drill
You should always have at least two methods of starting a fire with you at all times.
- Survival Lighters
- FireSteel
- Survival Matches
- Water Proof Matches
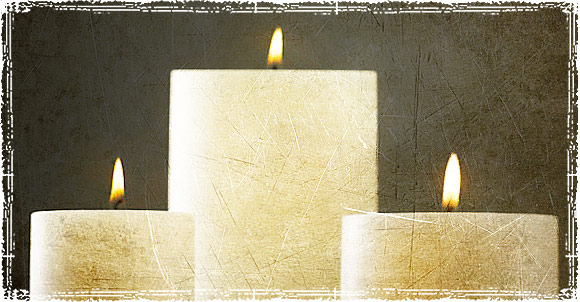
- Emergency Candles: Candles are a good way of getting damp tinder and wet wood to start. If you only have a few matches, use your match to light the candle first. A candle will last a lot longer than a match, and gives you more time to start a stubborn fire.
2 Man Hand Drill
Hand drills are a great way to start a fire in the wilderness. This 2 man method we’re showing is a modified version of the Hand drill and is far easier to use than a traditional one person hand drill.

Follow these steps to use the 2 man Hand Drill Method
- Make sure you have a tinder bundle prepared for when you get an ember.
- Cut a V-shaped notch in the board, then start a small depression with your knife tip. Set a piece of bark underneath the notch to catch your ember.
- Have one person apply a good amount of downward pressure to the drill while the other uses some cord (paracord, shoe lace, etc…) to quickly rotate the spindle. until the spindle tip glows red and you get an ember.
- Tap the board to get the ember onto piece of bark, then transfer it over to the tinder bundle and blow it until you get a flame.
Drill to Start a Fire
A Fire Drill or Bow Drill is a primitive tool for starting a fire that consists of a bearing block (handle), a spindle, a simple bow, and a piece of wood. These type of fire drills were commonly used by Native Americans, and its first use can be traced back to the Iroquois.
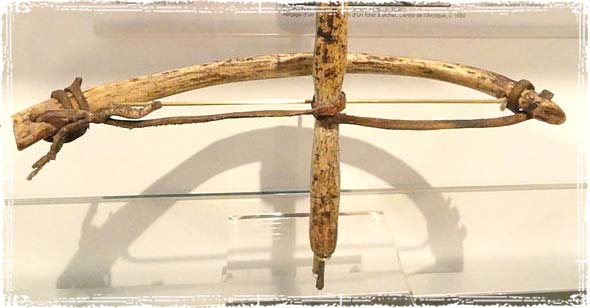
Like all friction fire starting methods, the drill uses friction to generate heat. This heat will eventually produce an ember that can then be transferred to a tinder bundle.
Using a Fire Drill to Start a Fire
It all starts with your tinder bundle.
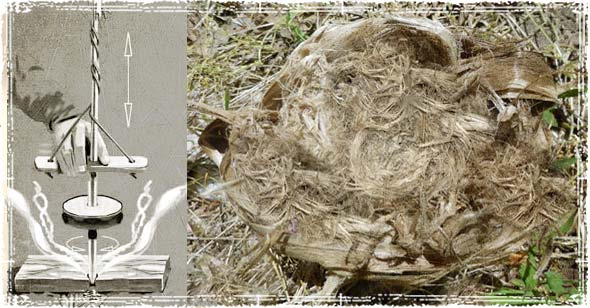
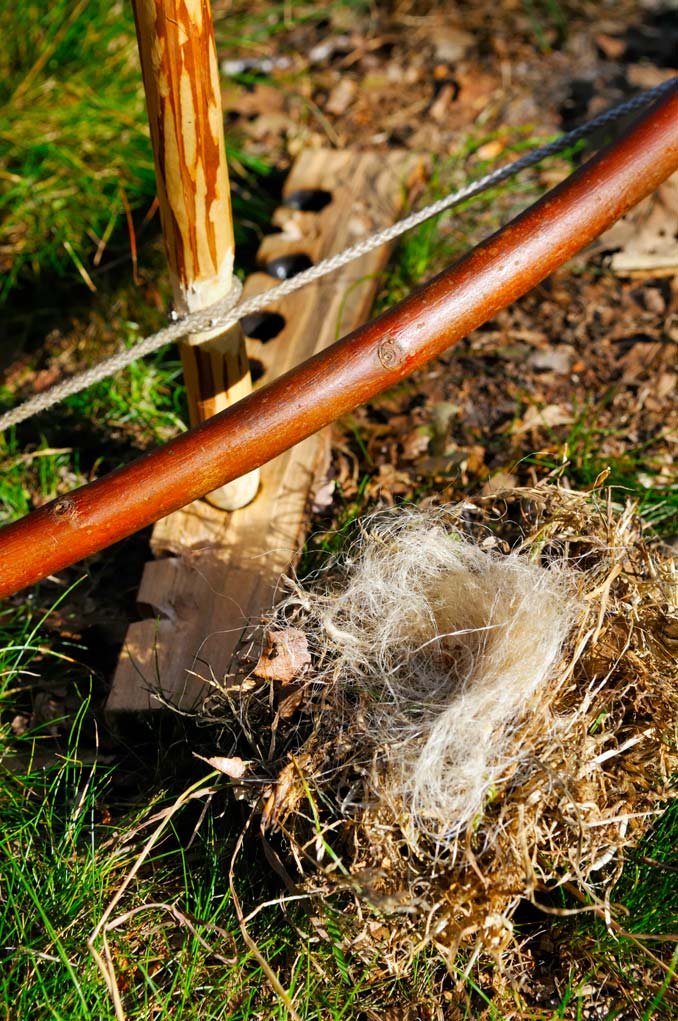
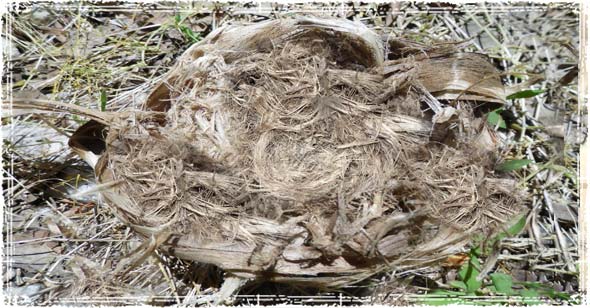
One of the most important parts of any friction fire-starting method is not so much what method you use, but instead making a good tinder bundle. A good tinder bundle is essential for turning your ember into a roaring flame. When building a tinder bundle, your goal is to make the bundle to resemble a birds nest.
It should be made up of stringy, fluffy, and combustible materials like dry grass, wood shavings, bark fibers, cattails, and punkwood.
Constructing and using the Bow Drill
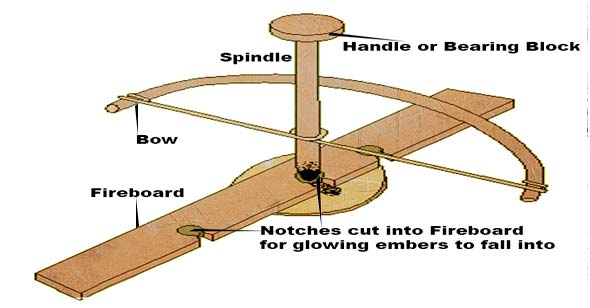
- Cut a hole into the side of your fireboard to place the spindle into. The hole should be notched with a V shape so the ember falls into your tinder bundle or container.
- The spindle is constructed using a hardwood carved at one end to reduce friction and the other to increase the amount of friction so as to generate heat for an ember.
- Attach the crossbar or bow to the top of the spindle. The bow can be constructed with a bit of paracord or cordage wrapped once around the spindle.
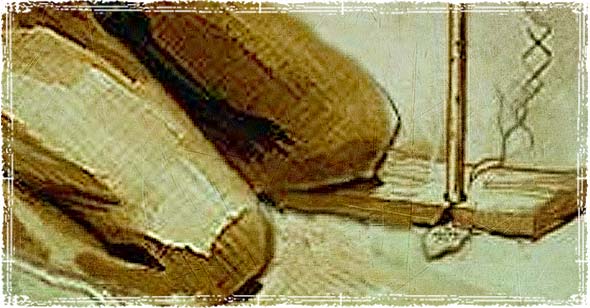
Using the Bow drill to Start a Fire
- Place your knee on the fireboard to hold it securely in place.
- Pushing down on the bearing block (handle) and start pulling the bow back and forth.
- Repeat step 2 until the friction creates a glowing ember
- Transfer the ember into your tinder bundle and blow until you see a flame.
Firestarting with a Fire Plough
A fire plough is a pretty basic fire-starting method, one that is really just a modified version of rubbing two sticks together to generate heat through friction. By moving the top stick back and forth through the grove in the bottom piece of wood, you generate heat which will eventually ignite a small coal or ember.

How to use a Fire Plough: Follow these steps.
First, you want to make sure you have a good tinder bundle prepared for the coal. The tinder bundle really is the key to successfully starting the fire once you’ve produced an ember.
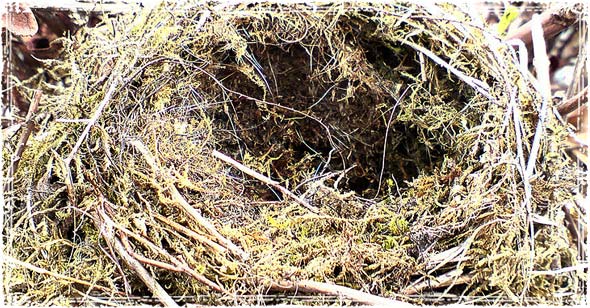
Dry grass, wood shavings, bark fibers, cattails, and punkwood all make great tinder. Once you have your materials, you want to fluff them up and create as much surface area as possible for the ember to ignite. Your bundle should resemble a birds nest, and should be loose so oxygen can help ignite the flame.
Making the Fire Plough

- Place the tinder bundle or something to catch your embers at the end of the board.
- Run a stick back and forth to form a long grove into the middle of some softwood,
- Continually plough or rub the tip of the stick at about a 35-45 degree angle, back and forth down the length of the board. The friction will push down some heated dusty particles from the board, which will eventually start to ignite embers as the temperature increases.
- Once you have a coal or ember, transfer your it into the tinder bundle that you have waiting.
- Blow into your Tinder Bundle until you get a flame.
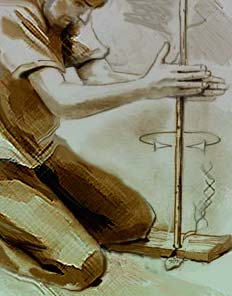
Fire Starting – Hand Drill
Before attempting to use the hand drill, you want to make sure you have a good amount of tinder. One of the most important parts of any friction fire-starting method is the type of tinder you use to turn the ember into a flame.
Your tinder bundle should be made up of stringy, fluffy, and combustible materials like dry grass, wood shavings, cattails, bark fibers, and punkwood. Once you have the tinder materials, make sure to fluff them up and create as much surface area as possible for the ember to ignite.
Follow these steps to use the Hand Drill Method
- Make sure you have a tinder bundle prepared and ready to go.
- Cut a V-shaped notch in a board, then start a small depression with your knife tip. Set a piece of bark, or a big leaf underneath the notch to catch your ember.
- Place the spindle, which should be about two feet in length, in the depression. Then, while maintaining a good amount of downward pressure, roll the stick between the palms of your hands, running them very quickly down the stick.
- Keep doing this until the spindle tip glows red and you get an ember.
- Tap the board to get the ember onto your leaf or piece of bark, then transfer it over to your tinder bundle and blow into the bundle until you get a flame.
If you have a hard time with this method or your hands start to ache, a bow drill can be used in the same fashion.
Survival Lighters: The Top Weatherproof, Windproof, and Waterproof Lighters
Personally, I want to survive, and I want to make things as easy as I can on myself. You are already going to be dealing with multiple different stressors; the last thing you need during a crisis is extra work and stress.
So yes, I do carry fire steel and other fire-starting tools, but I also carry a lighter as part of my EDC, and I have one in every bag and kit I own. In a survival situation, where I’m cold and need to warm up quickly, I’m not screwing around with matched or bow drills; the first thing I’m going for is that lighter.
What is a Survival Lighter?
While nine times out of ten a Bic Lighter will probably work, when looking for something to keep in your survival kits and bug out bags, I recommend looking for a dedicated survival lighter.
A survival lighter should be weatherproof, windproof and waterproof; it should also be made of high-quality materials that will ensure it lasts and works when you really need it. Keep in mind, the environments that you are going to be starting fires in is an important consideration when choosing which type of lighter to go with.
Fuel and Ignition Types: What fuels are best?
When choosing a lighter, keep in mind that there are many different options. Let’s take a look at your choices.
Lighter Fluid: Lighter fluid can be found just about anywhere. It’s going to be one of the easiest fuels to find, which is always a plus when looking for preparedness related gear. The ability to find supplies during a disaster is always a major factor in the gear I choose, so the fact that this fuel is everywhere is something you should consider.
There are two types of lighter fluid: 1. Petroleum-based which uses Naphtha, a volatile flammable liquid hydrocarbon mixture and 2. Alcohol-based fluids like Charcoal lighter fluid, an aliphatic petroleum solvent.
Butane: Butane is an organic compound; it is highly flammable, colorless and used in refillable butane lighters and torches. A lot of the “windproof” lighters that you will find on the market generally take Butane.
Electric Arc and Plasma: Plasma and Arc Lighters are completely flameless, and don’t use combustible fuel. Most are powered by rechargeable Lithium-Ion batteries. Unlike open flame lighters, they don’t heat the tip of the lighter; they focus on the exact area you are trying to light. They are also windproof. The downside to these types of lighters is once the battery does, you are out of luck – unless you have a way to recharge them.
The Best Survival Lighters
The Bic Lighter

While technically not waterproof, throw one of these bad boys Waterproof Lighter case, and you won’t be able to find a better built disposable lighter on the market. They are cheap, easy to use and even if they get wet, blowing on the sparking element is often enough to get them working again.
Why we like the Bic:
- They are cheap and can usually be found for under $1 a lighter. Because they’re so cheap, there is no reason not to stash one in every kit, bag and vehicle you own.
- Every BIC is put through more than 50 quality checks during the manufacturing process.
- A single Bic will last quite a while; in fact, they are rated at up to 3,000 lights per lighter.
- They are Made in the USA.
The Classic Zippo Lighter

When it comes to survival lighters that have stood the test of time, there isn’t another lighter on the market that has the story and the history of the Zippo.
During World War II, Zippo stopped all commercial production and dedicated their entire line to supply the military. Since then, millions of military personnel have carried their Zippo into battle, and the term Zippo has found its way into the military lexicon. During Vietnam, the term “Zippo” was used anytime a fire or a flam was used. In fact, the flame-throwing M67 tank was referred to as the Zippo.
Why we like the Zippo
- They are as tough as nails! Most are made of metal or brass, and it’s not uncommon to find a working Zippo that is decades old. To top it off, each Zippo comes with a lifetime warranty.
- The zippo windscreen makes them windproof, and they stay lit even in harsh weather.
- Because they are so iconic, and because they come in some many styles, carrying one isn’t going to look weird, even in an office setting.
- They are refillable and are fueled with butane.
- They are also made in the U.S.A
Vertigo by Lotus Cyclone Triple Torch Cigar Lighter
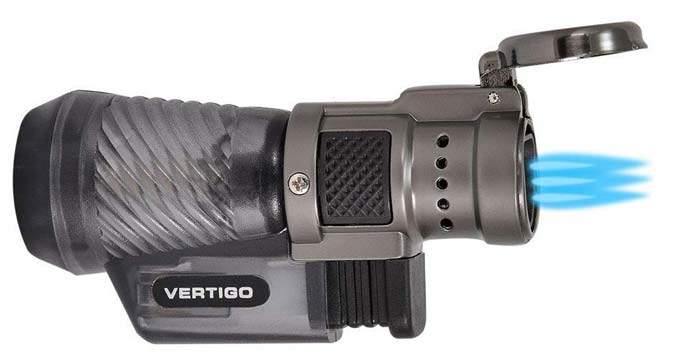
While technically sold as a cigar lighter, it’s one of the most reliable lighters you can find. They are made for cigar smokers, so they are meant to be used a lot. It uses butane as fuel, and the tank can hold quite a bit so it should last a good amount of time. The triple flame makes it pretty close to windproof, and it tends to hold up pretty well in harsh weather conditions.
lcfun Waterproof Lighter
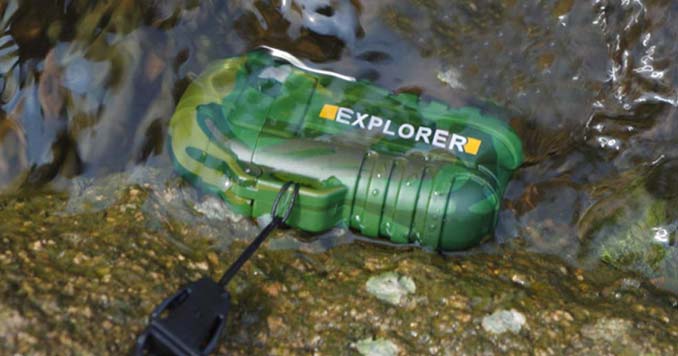
The Ifcun Explorer is windproof, waterproof arc electric lighter that is great for emergencies. The flameless lighter is lightweight, durable and will even
light when wet. What I don’t like about these types of lighters is the fact that you need a charged battery for them to work, that being said they are getting better, and they do hold a decent amount of charges.
I’m not a huge fan of Arc lighters, but if you are going to buy one don’t get suckered into buying one that costs more than this. These are definitely knockoffs, but in my experience, they work better than the ones made by so-called survival brands.
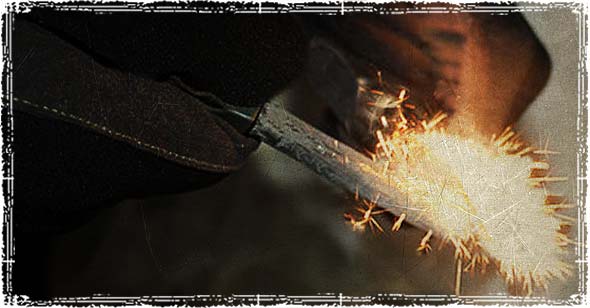
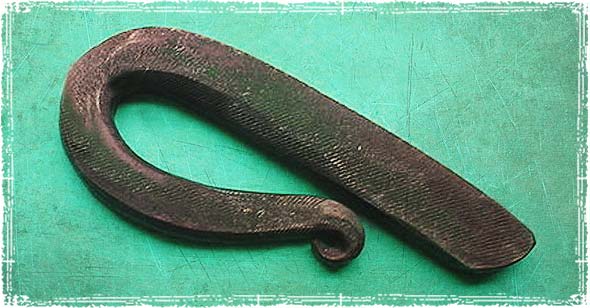
FireSteel: Using Firesteel and Ferrocerium rods to Start a Fire
Firesteel is a must have for any survival kit. The good ones will allow you to light thousands of fires from a single stick, and can be used in even the harshest conditions imaginable.
What is Firesteel?
Traditional Firesteel is made from a piece of high carbon or alloyed steel, which will produce a spark when struck by the sharp edge of a flint rock. Before steel came around, they were usually made from iron pyrite or marcasite. They are traditionally carried inside some sort of tinderbox with charred cloth, tinder and a piece of flint.
Commercial Firesteel Ferrocerium Rods
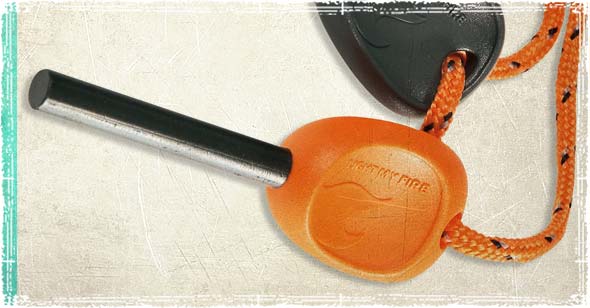
Most Commercial Firesteel is not made of steel at all, but instead is usually made with a Ferrocerium rod. The Ferrocerium produces blazing hot sparks that can reach 5500 °F. They are lightweight, easy to use, and can even be used after getting wet.
Most commercially available sticks will light thousands of fires, and in my testing have always topped the list of reliable methods for starting a fire in severe conditions. They are especially useful in wet environments; and can be used even after being dropped in water and snow. Simply dry it off, strike the rod, and you have yourself a shower of blazing hot sparks that will light almost any tinder.
Using Firesteel to Start a Fire
To get a fire going, even in harsh wet environments:
- Simply pile up a small amount of tinder (lint, cotton, charred cloth, dry grass, shredded bark, or other flammable materials that will take a spark).
- Run the back edge of your knife down on the rod, aiming the sparks into your pile of tinder. Some Firesteel rods are sold with a small steel striker attacked to the Ferrocerium rod.
- The spark should create a fire even in really bad conditions. The key is choosing the right type of tinder that will take a spark.
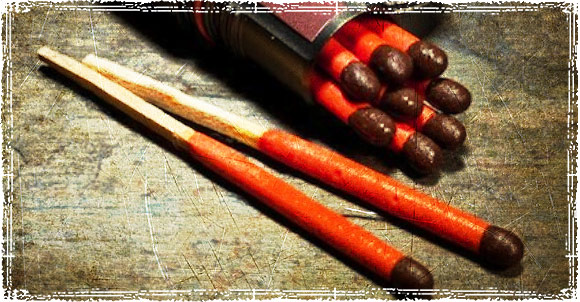
Survival Matches
Matches can come in very handy during a survival situation. Stock up on as many as you can; they’re cheap and extremely useful in any emergency situation. From lighting candles for emergency lighting to getting fires started for cooking, matches are a survival necessity.
If you are going to stock up on matches, try to find the Strike Anywhere matches, which are a far better option than ordinary matches. Strike anywhere matches can be lit by striking them on any solid surface.
It is also a good idea to waterproof a small amount of matches with wax. Once waterproofed store them in an old Altoids tin and put them somewhere safe.
How to Make Waterproof Matches
If you carry matches as your primary means of starting a fire, I highly advise rethinking that strategy. While some outdoorsmen seem to think it’s more “outdoorsy” to carry matches, in a survival situation, do you want to look like Bear Grylls, or do you want to stay alive?
While my number on choice of fire starting tools is usually a lighter – again I’m concerned with staying alive not looking cool – I do think carrying backups to that lighter is extremely important. If matches are one of those backups, they need to be waterproof.
You can purchase commercial waterproof matches, or you can save some money and make your own.
Making waterproof matches
Method 1: Candle Wax or paraffin wax
An ordinary box of strike anywhere matches can be turned into a box of waterproof survival matches with an ordinary household candle.
- Melt some candle wax or paraffin wax in a pot. If the candle is already inside a glass jar, the safest method would be to leave the candle in the jar and let the wick slowly melt the wax.
- Dip the match heads into the liquid wax and coat the entire match head.
- Let the wax harden over the match head.
- When needed, the wax can be picked off the head before striking the match
Method 2: Fingernail Polish
With a small bottle of fast drying nail polish you can easily coat your match heads, making them completely waterproof.
- Paint the match head with the nail polish, coating it a little past the head on to the wood stick.
- Let the matchstick dry completely.
- Matches coated with the nail polish don’t need any kind of prep to light them. They should be ready to strike without having to pick off the polish.
Method 3: Turpentine
Turpentine is another easy way to make your matches resistant to water damage.
- Pour 2 to 3 large tablespoons of Turpentine into a small glass jar.
- Place the matches head down into the jar and let sit for 5- 10 minutes.
- Remove the matches and let them dry for 20 minutes.